

Before you begin
To activate Ziina on , make sure:- You’ve completed onboarding.
- Your Ziina account is verified.
Requirements
1
Check if you have WooCommerce or WordPress
Open your store website, and check the side bar. If WooCommerce appears as
shown in the screenshot below, continue following the steps in this guide.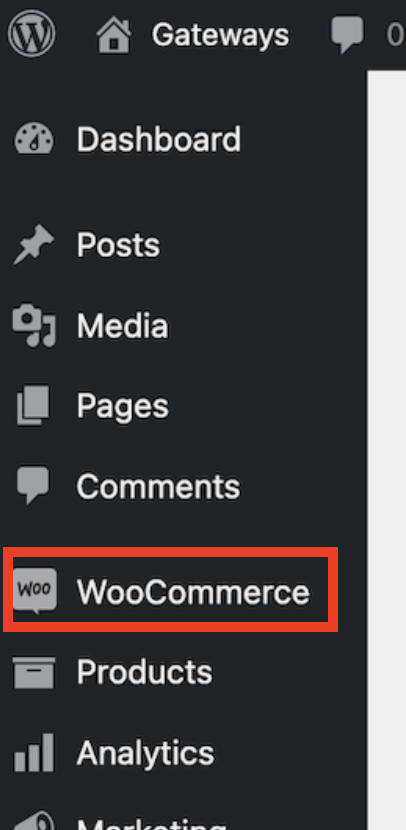
2
Creating a Ziina Account and Getting your API key
Click on this link, select
WooCommerce and enter your phone number, OTP and email. You will immediately
get access to your API key. This is the only time you’ll see it, so make
sure you store it somewhere safe. If you don’t already have a Ziina account
your integration won’t work until you download the app and complete your
onboarding process (it takes 4 minutes).
3
Download the Ziina App and complete onboarding
Download the Ziina
App
on your phone, click on Ziina Professional, enter your phone number and
complete the onboarding steps (you will need your Emirates ID). You won’t be
able to receive payments on your website until this step is completed and
your account is verified.
Installing the Ziina plugin
1
Log in to your WordPress site
2
Add new plugin
In the left sidebar, hover over Plugins and then click Add New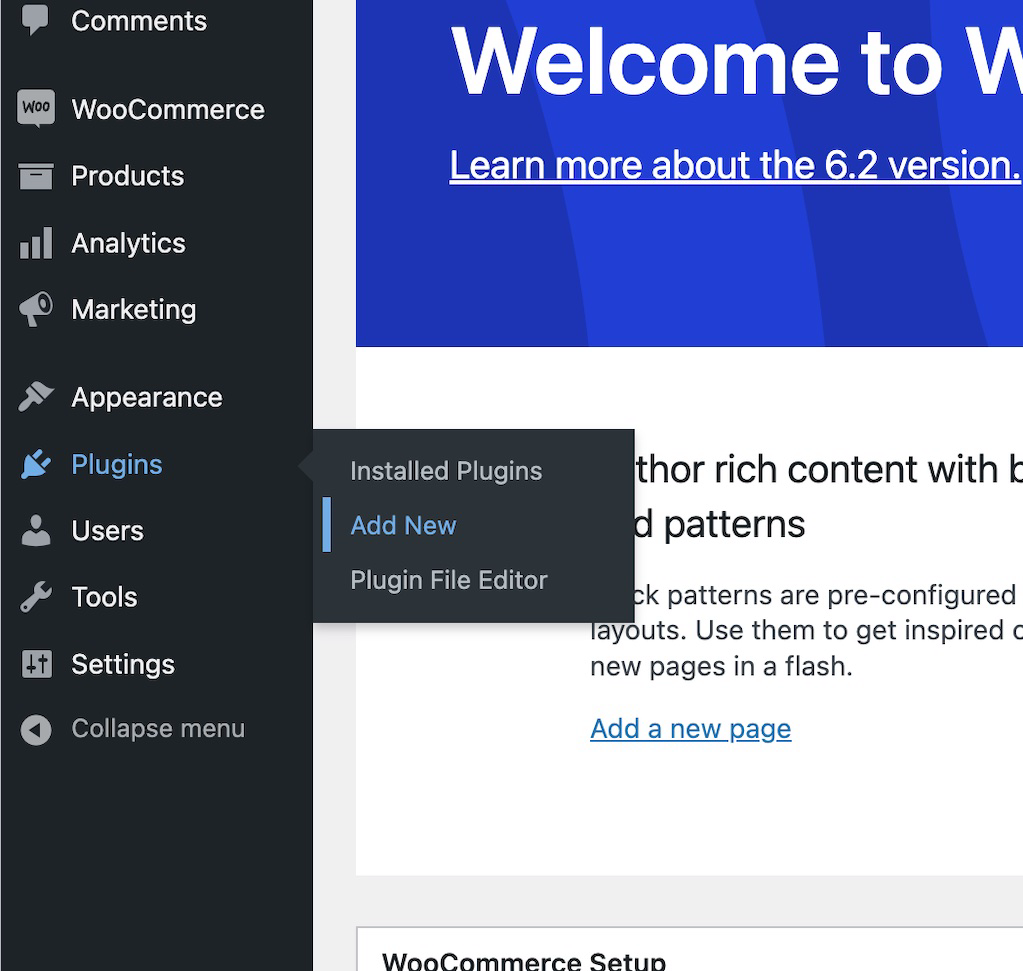
3
Install Ziina plugin
Enter “Ziina” in the search bar and click Install Now to install the
plugin.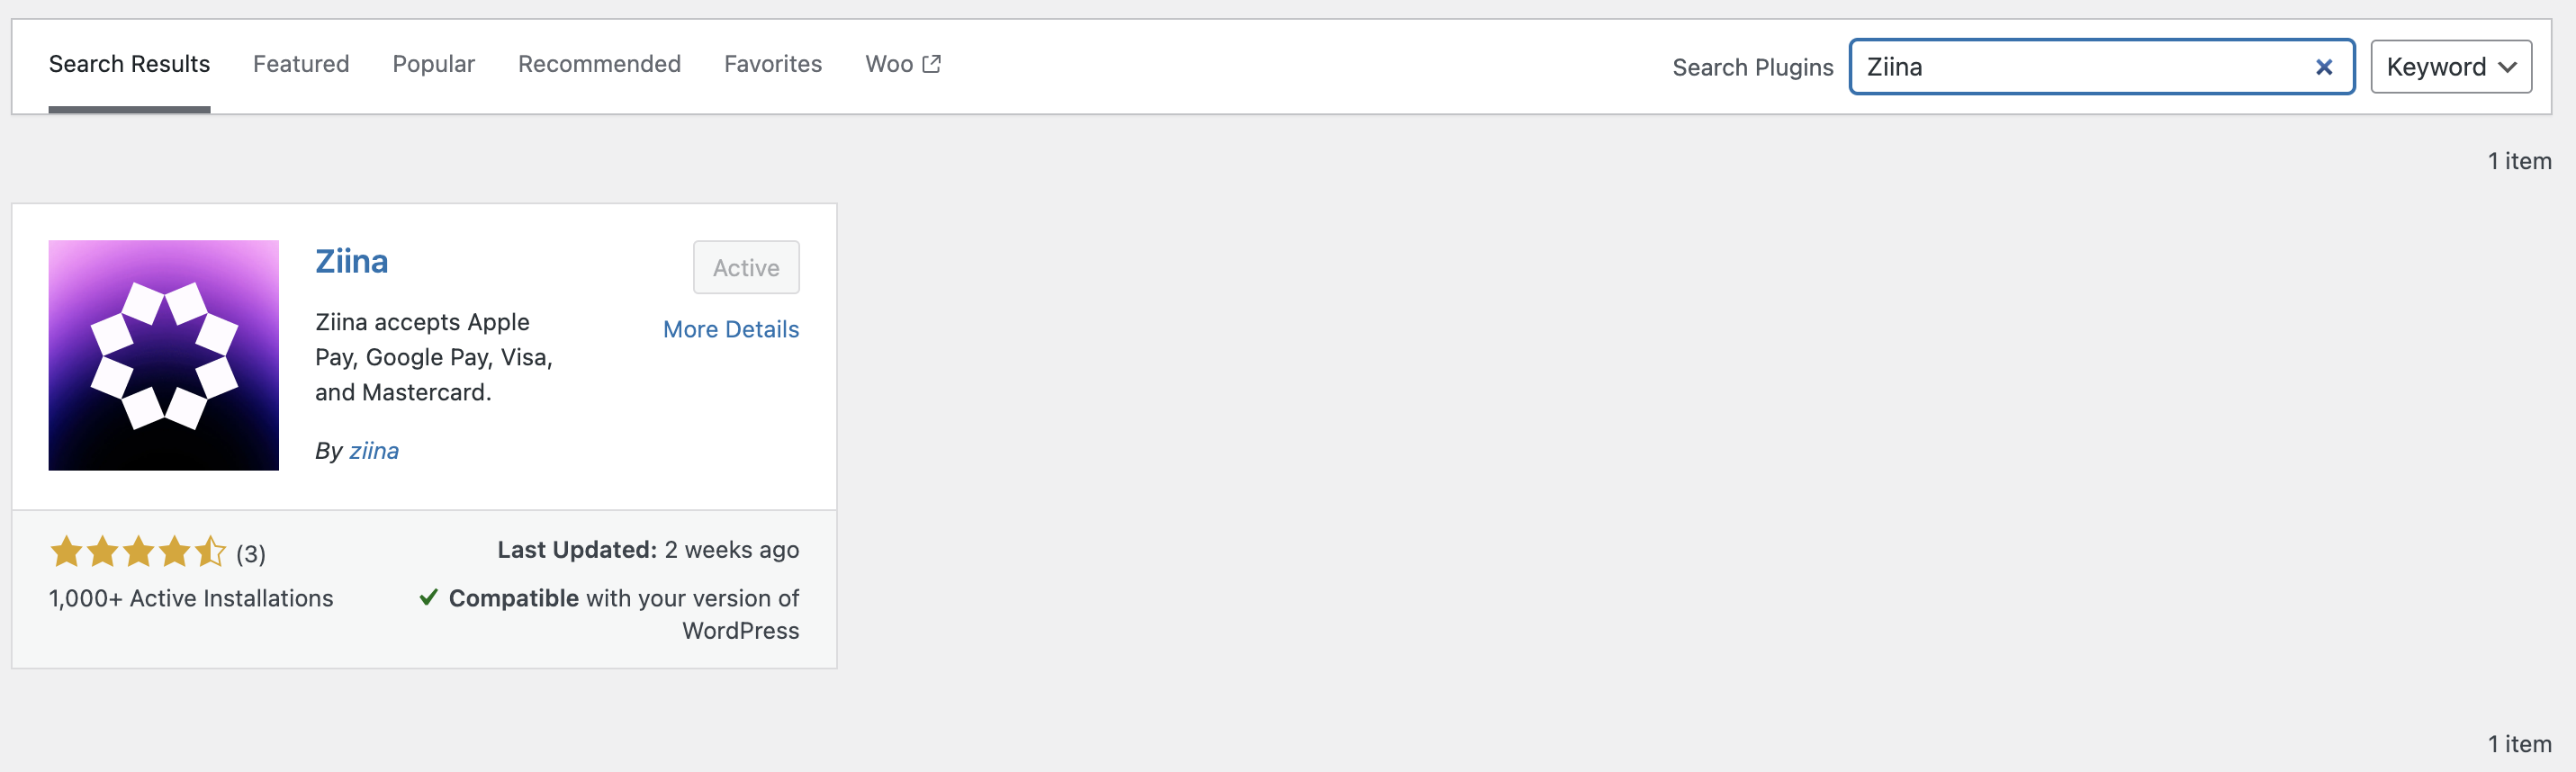
Configuring the Ziina plugin
1
Open WooCommerce settings
Click on WooCommerce in the left sidebar and click on Settings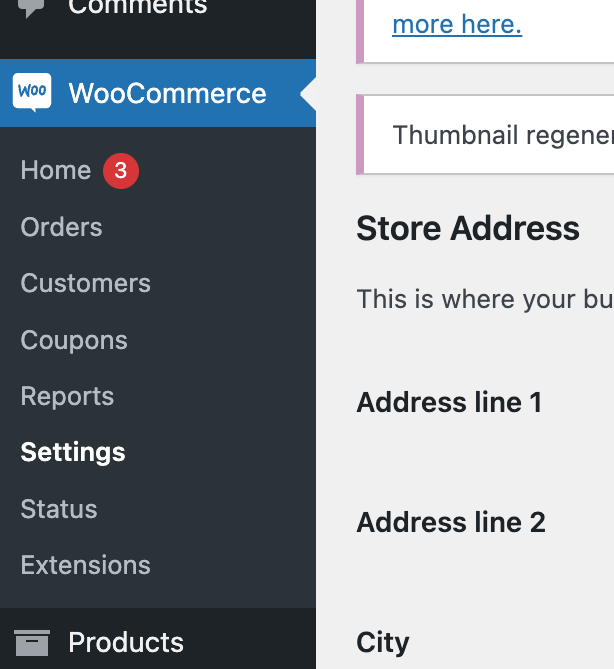
2
Open payments tab
Select Payments at the top of the page.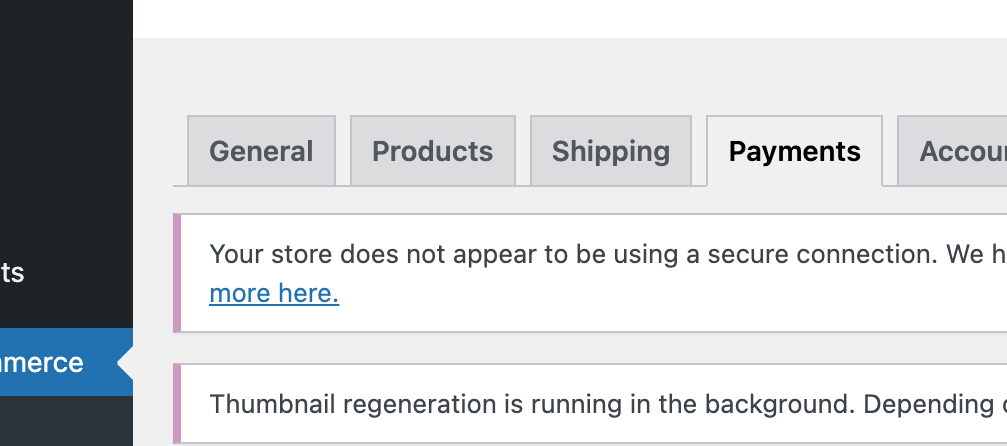
3
Ensure Ziina is enabled in the list of payment options
Ziina payment toggle is supposed to be switched on
4
Configure your API key
Enter your API key in the field API key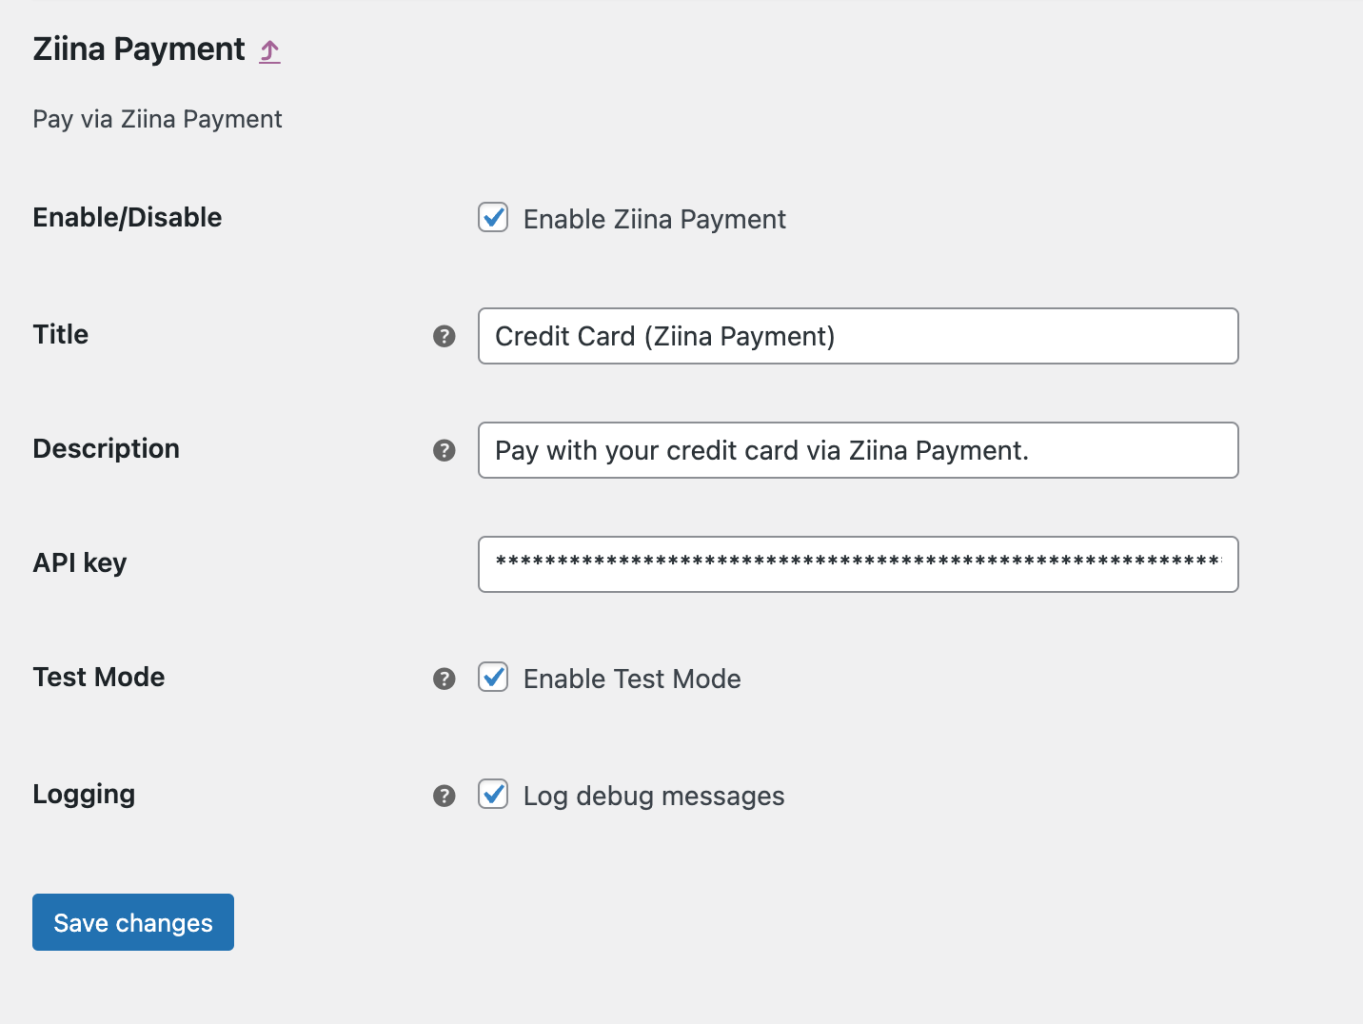
5
Optional: change title and description
You can also change the Title and Description of the Ziina payment
option. The title you enter is what appears on your website for your
customers. Let them know they can use this payment option to pay by
credit/debit card, Apple Pay, and Google Pay.
6
Click 'Save Changes' and you’re done!
Embedded Checkout
The embedded checkout mode displays the Ziina payment widget directly on your WooCommerce checkout page, so customers complete their payment without being redirected to an external page.Enabling embedded checkout
These settings are available starting in plugin version 1.2.21. If you do not see them, update the plugin.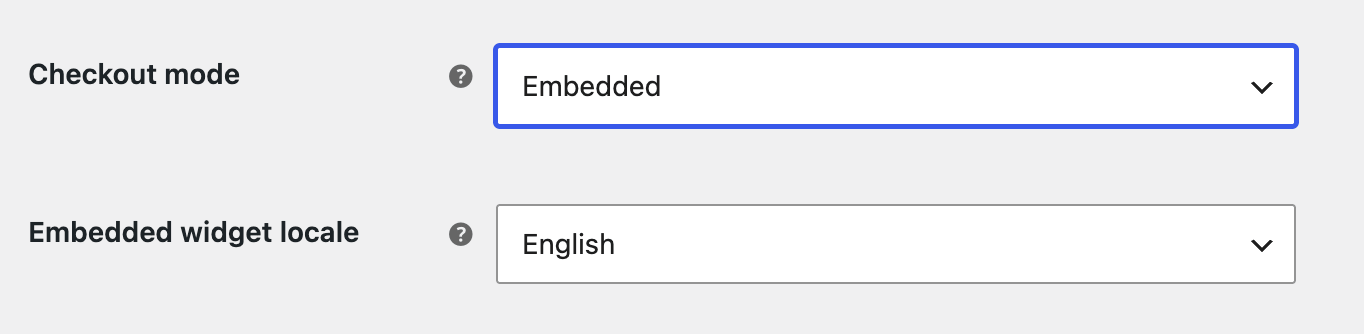
1
Select 'Embedded' as the checkout mode
In the Ziina plugin settings, find the Checkout mode dropdown and select Embedded.
2
Set the embedded widget locale
Use the Embedded widget locale dropdown to choose the language the payment widget will display to your customers (e.g. English or Arabic).
Domain verification
Embedded checkout requires your store’s domain to be verified before it can be activated. Follow the three steps below inside the plugin settings panel.1
Set up domain verification
Click the Set up domain verification button. This automatically places the required Apple Pay domain verification file on your site. Once the file is in place, you will see the confirmation message Domain verification file: present beneath the button.
2
Contact support to whitelist your domain
Click the Contact support button and send a message to the Ziina support team asking them to verify and whitelist your domain. Include your store URL in the message.
3
Save your settings
Once Ziina support confirms your domain is verified, return to the plugin settings, make sure Embedded is selected as the checkout mode, and click Save changes.
Domain verification is a one-time step. You do not need to repeat it unless your store domain changes.
Completing a test transaction
To test a transaction, check the box in Ziina payment settings titled Test mode.